

A rain garden is like a natural green sponge in your yard: a shallow dip planted with perennials, flowers, and shrubs that captures rainwater flowing from rooftops, driveways, and patios.
Compared to a traditional lawn, it can hold up to 30% more water, allowing the soil to absorb it instead of letting it rush away. It’s not a pond or a wetland, most of the time it stays dry, filling only when it rains.
Beyond slowing down runoff, a rain garden also filters pollutants and improves your backyard’s microclimate. Environmental agencies often recommend it as one of the most effective and eco-friendly ways to manage stormwater at home.
In this step-by-step guide, you’ll learn how to design and build a backyard rain garden that not only works for years but also enhances the beauty and biodiversity of your landscape.
Can I Design a Backyard Rain Garden myself?
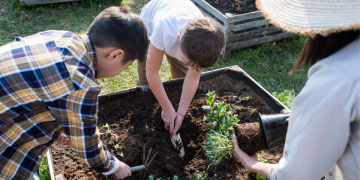
Absolutely! Designing your own rain garden can save money and bring real satisfaction, especially if gardening is already your hobby. Many homeowners manage to complete one in just a day.
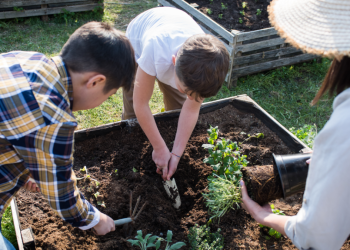
The hardest part is usually the digging, since adding soil amendments often means removing 6 to 8 inches of earth. Think of it as a mini construction project with a big payoff. And if you don’t feel like doing it alone, you can always turn rain gardening into a fun family activity.
Designing Your Backyard Rain Garden
Before you grab a shovel, it’s essential to map things out. Think of it as drawing a blueprint before building a house, planning ensures your rain garden works properly and fits your yard.
Calculate Runoff Volume: Start by estimating the total square footage of the impervious surfaces around your home (roof, driveway, patio). This number tells you how much water your rain garden should be able to absorb.
Size Your Garden: A good rule of thumb is to make your garden 5–10% of the drainage area. For example, if your home has 1,500 square feet of impervious surface, your rain garden should be between 75 and 150 square feet.
Gather Tools and Materials: Collect what you’ll need to shape and build the garden:
- Shovel
- Measuring tape
- Soil amendments
- Native or adapted plants
- Pipes or channels
Draw a Layout: Sketch the shape of your rain garden, along with its inlet and overflow areas. If needed, ask a professional for help. Be sure to include planting zones based on moisture levels and sunlight exposure—this will make your garden both functional and beautiful.
What is the typical Cost to Design a Backyard Rain Garden?
The total cost depends mainly on your soil type, the size of the area draining into the garden, and the plants you choose.
If you go the DIY route, expect to spend about $4 to $5 per square foot on soil amendments and plants. That means a 100-square-foot garden could cost as little as $400–$500.
Hiring a professional landscaping company raises the price to about $10 to $15 per square foot, but you’ll get expert design and installation.
Either way, a rain garden is often less expensive than other landscaping projects, and it pays off by reducing runoff and boosting your yard’s health for years to come.
How to Build a Backyard Rain Garden?
Building a rain garden is easier than it sounds, as long as you follow the steps carefully. Think of it as setting up a natural water system right in your backyard.
Choose a Site
Pick a spot where water naturally collects, such as your backyard low point, or guide water from a roof downspout into it. Keep these rules in mind:
- Place the garden at least 10 feet away from your house to protect the foundation.
- Avoid septic tanks, utility lines, or areas with heavy shade.
- A mix of sun and partial shade works best.
Prepare the Site
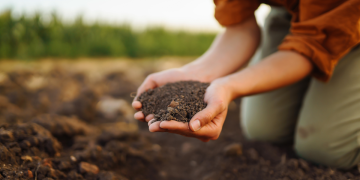
Clear any grass or vegetation, then check whether the soil drains well. Heavy clay won’t work without improvements. To find out, do two quick tests—like a mini soil lab in your own yard:
Ribbon Soil Test
- Collect soil 4–6 inches deep.
- Moisten until moldable.
- Roll into a ball and press between your fingers to form a ribbon.
Results:
- No ball → sandy soil.
- <1 inch ribbon → silty soil.
- 1–2 inches → slightly clayey (acceptable).
- 2 inches → heavy clay (unsuitable).

Soil Infiltration Rate Test
- Dig a hole 6–12 inches deep and 4 inches wide.
- Fill with water and let it drain for 1–2 hours.
- Refill, mark the water line, and measure hourly.
Results:
- Water drops ≥½ inch → good drainage.
- Water drops <¼ inch → poor drainage (amend the soil or choose another spot).
If your soil needs improvement, mix in 20–30% compost and 50–60% sand to increase permeability. Remove compacted clay so water can filter effectively.
Dig Your Garden
Excavate a shallow basin, about 6–8 inches deep, sloping toward the lowest point in the center. Use the removed soil to build a small berm around the edges, this slows runoff and keeps water in. To guide rainwater in, add river rocks or install an underground pipe from your gutters.
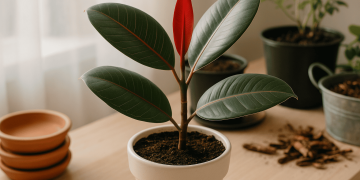
Choosing the Best Plants for Your Rain Garden
The right plants will make your rain garden both resilient and beautiful. Focus on native, pollinator-friendly species that can handle occasional flooding as well as dry spells. To keep your garden attractive year-round, select plants that bloom at different times of the season, like assembling a choir where each voice comes in at the right moment.
You can also add ornamental grasses for structure and movement.
Here are a few planting tips:
- Place drought-tolerant species around the outer edges.
- Group plants in clusters of 3 to 6 of the same kind for a natural, balanced look.
- After planting, spread a layer of mulch to retain moisture and suppress weeds.
With the right mix, your rain garden will not only manage water but also become a thriving habitat for local wildlife.
Maintaining Rain Garden Backyard Plants
Like any new planting project, a rain garden needs extra attention during its first year, think of it as caring for a child until it grows strong enough to thrive on its own.
Here’s what to focus on:
- Water regularly at the start to help roots establish.
- Weed often, since young plants can struggle against competition.
- Watch how rainwater enters the garden—if it washes mulch away, slow it down with a few extra rocks at the inlet.
- Skip fertilizers: rain gardens don’t need them.
- Inspect periodically and remove any dead or dried vegetation.
Once established, your rain garden will need far less care while continuing to manage water and support local biodiversity.
Final Thoughts: Why a Rain Garden Is Worth It
A backyard rain garden is one of the most effective and sustainable ways to manage stormwater at home. With thoughtful planning and a little ongoing care, you’ll create a system that reduces runoff, supports local biodiversity, and enhances the beauty of your landscape.
Beyond its practical benefits, a rain garden is something to feel proud of. It’s a sign of eco-friendly living, and a daily reminder that your backyard can be both beautiful and sustainable.